


Cement Autoclave for testing soundness
Cement Autoclave for testing soundness
YZF-2A Cement Autoclave Tester is suitable for the GB/T 750-2024 national standard. It is a specialized instrument used by cement production units, building material research institutes, universities, and construction quality inspection departments to determine the adverse effects of MgO (magnesium oxide) on the stability of cement. The equipment accelerates the hydration of periclase in clinker under high temperature and high pressure conditions to measure the non-uniform volume changes in cement that may result from the hydration of periclase.
Technical Parameters:
2.1 Pot Volume ≈ 8.5L
2.2 Pot Inner Diameter: φ160mm
2.3 Maximum Working Pressure: 2.5Mpa
2.4 Standard Pressurization Time: 65~95 min
2.5 Fluctuation Range of Automatic Pressure Control: ≯ ±0.05Mpa
2.6 Holding Pressure Time: 3h (adjustable)
2.7 Rated Voltage: 220V
2.8 Rated Power: 1200+600W
2.9 Dimensions: Kettle Diameter 400*1120mm, Control Cabinet 480*300*894mm
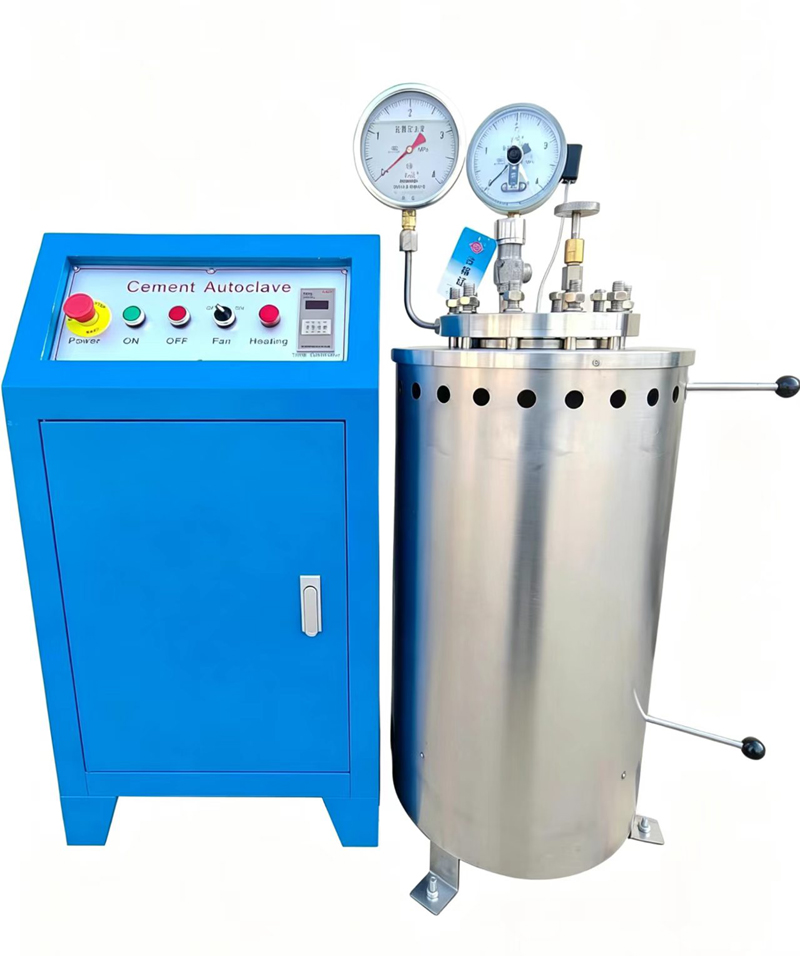
YZF-2A Cement Autoclave Tester-seperate type:
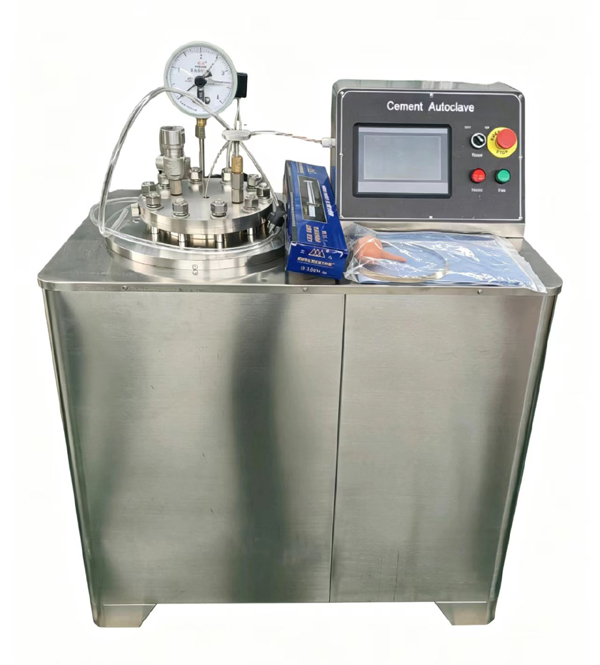
ZYF-2A Cement Autoclave Tester :
Basic Structure
The main components of Cement Autoclave are mostly made of high-quality stainless steel materials, capable of withstanding high temperature and high-pressure saturated steam. The kettle lid is equipped with a stainless steel pressure gauge and a vent valve. The kettle body is installed inside the casing and is additionally connected to a safety valve. Two electric heating jackets are installed on the lower outside for heating the kettle body to generate steam; the bottom pipeline is connected to an electric contact pressure gauge. The touchscreen control system works with the pressure gauge to maintain the pressure inside the kettle within the set range. A ventilation fan is installed at the bottom of the kettle body for exhaust and cooling after the test is completed. The upper part of the casing serves as the control box, with buttons on the panel for start, stop, fan, heating, and constant temperature.
Instrument Installation
1. This instrument should be installed in a relatively quiet place. To ensure safety and convenient use and maintenance, the instrument should face away from the wall and be at least 500mm away from the wall.
2. The instrument should have a reliable grounding wire for grounding.
Operation and use
4.1 First, rotate the electric contact pressure gauge pointer to the right to 2.0Mpa
4.2 Open the lid of the pot and fill the pot with 850ml of distilled water.
4.3 Put the bracket containing the specimen into the pot.
4.4 Place the sealing rubber ring in the sealing groove, and the rubber strip can be used many times, when the seal is not tight
Replace the seal ring with a new one.
4.5 Gently cover the lid, press down and turn the lid left and right to confirm that the
lid and the joint of the lid are completely tight. Flat pads, springing pads, and nuts were installed on 10 M16 bolts. Then use a torque wrench to fix them one by one in the order of covering the bolts diagonally, first screw 1 and 6, then 4 and 9, 2 and 7, 5 and 10, 3 and 8; Tighten all the nuts repeatedly, and finally check whether the torque reaches 100 N·m one by one in the order of 1, 2, 3, 4, 5, 6, 7, 8,9, and 10.
4.6 Inject 3-5 drops of temperature guide oil into the temperature measurement hole in the center of the pot lid, and insert the temperature sensor into the tube.
4.7 Open the valve and heat it in a counterclockwise direction
4.8 Set the pressure value to 2.0MPa in the electrical contact pressure gauge.
4.9 Open the air valve in the counterclockwise direction, connect the power supply, press the start button on the control box, the heating indicator light is on, the kettle body begins to heat at 1800W power, when there is steam discharge, the bleed valve is closed, when the pressure reaches the set 2.00Mpa, the temperature is 215.7 °C to start the thermometer, at this time the constant temperature time relay is on, the time starts to be timed, when the time reaches the set 3h time and the instrument automatically cuts off the power and stops heating.
4.10 After clicking the exhaust start button, cool down to the pressure in the kettle within 90 minutes until the pressure is less than 0.1Mpa. Open the valve to remove the remaining steam in the pot. After the instrument cools to room temperature, turn off the exhaust button, remove the temperature sensor, unscrew 10 nuts in the same way as the pot lid (at least two cycles should be used to loosen the nut to avoid damaging the sealing bond surface), remove the pot cover, and take out the specimen holder. Use a hose to suck out the distilled water in the pot and wipe it clean, then cover the pot lid.